Thank you again for your votes with the Homies! It's the home stretch (voting ends tomorrow! yikes!), and the race is so, SO close! If you have a minute, I would love your vote HERE and/or HERE. Winning would mean a lot of great traffic for me for years to come. Thanks a million! xo


You'll still use the mini-blinds mechanism for the base (which helps keep the cost of this project way down), but the vinyl slats get ditched. The result is a slightly more relaxed shade, which I often prefer over perfectly stacked flat folds of fabric that look a little too-uptight or something. Also, I usually suggest a linen for DIY-ing roman shades because the loose weave is super forgiving for those of us that struggle to cut an exactly straight line. :)

Okay, let's jump in!
As you can tell from the photos, I ended up going dark on the walls in our master bedroom. The color is Benjamin Moore's Anchor Gray. I'm in love - it's really pretty and moody. I wanted to find some fabric for shades that complimented the wall color, but that was still in on the lighter side. I popped into Mood and they had this really pretty linen from a Marc Jacobs line that called to me from across the room. (one of my favorite things about Mood is they often tell you what fashion house made and used the fabric first - the printed silk section is OUT OF THIS WORLD)


And then along the top and bottom of the shade, I folded about an inch of fabric, twice, so that the raw edge is hidden:

3) If you don't want to line your shade, go ahead and skip this step. I chose a lighter liner (just some mid-weight white cotton, really) that wouldn't really block the light, but just sort of give it a nice filter. It also helps the shade look better from the outside of the house. You can do a black-out liner here if you want. Be sure to use a heavy-duty gauge sewing needle on your machine, though, if you do.
You can cut the liner out to be pretty close to the dimensions of your finished shade. You just tuck the liner under the seams of your shade fabric so no raw edges show. Pin everything in place.

4) Sew along the perimeter of the shade - just one big rectangle. And that's it for the machine sewing!

5) Pull out your mini blinds (remember to keep the mounting hardware!) and completely cut off the heavy slat at the bottom. Snip all the strings.

Then snip off all the ladder-shaped strings, being careful not to cut the cord. Pull off all the slats and the ladder strings so that you're left with only the top mechanism and the thicker cording.

6) Lay your shade fabric face down with your mini blinds mechanism and cords laying on top in place. Using the cords as your guide, mark out where you want your fold lines to be (I just drew little X's with a pencil).
I think a 10" gap makes for a nice fold size. Here's an important part though: I wanted there to be a bit of a drop on the bottom of my shade so that the trim wouldn't be hidden by the folds. So I made a mark at 8" above the bottom of my fabric. (this will make more sense in a second)

7) Sew one of these little drapery rings at each of your markings, or basically where the cord meets the fold lines.

I used invisible thread and stitched all the way through to the front of the shade. My shade is pretty wide, so there are three cords in the mini-blinds mechanism, so I ended up sewing 18 plastic rings on by hand. This is by far the most tedious part of the project, but it should only take about an hour. If your shade is shorter, you'll probably only have two cords and much less ring-sewing to do.

8) I used a small slat of flat, 1" wide wood and three very small eyelet screws to make the bottom part of the shade.

9) Glue the bottom slat 8" above the true bottom of the shade, so that the folds would not cover the trim. Be generous with the fabric glue, but make sure there's no seepage happening through the front of the fabric.
(also, you can sort of see the line of three plastic rings sewn in place here, 10" above the bottom wooden slat)

Also glue the top mechanism to the top of the shade. You'll want to leave a little bit of fabric on the top and sides (I should have left more room on the sides). Also, make sure your cord is coming out of the back of the mechanism and isn't glued down to the fabric.

10) Thread your cords through all the tacked down plastic rings and then tie the cord to the eyelet screws in your bottom slat.

Then just hang your shades like you would a mini-blind, using the mounting hardware that came with the blinds, and you're DONE! Unless you want to add trim like I did, but that's just a matter of a quick line of fabric glue. I usually do shade trim in a U-shape so the top of the shade has no trim.

The biggest benefit of this approach over the no-sew version is there are no ugly mini-blind slats peeking through the fabric. And the finished product is probably more durable.

I love how soft and relaxed the linen looks and I think it works for my space, but if you're looking for perfectly straight folds with no slouching at all, you'll have to sew in wooden dowels along every fold. I've done it once before and it was about three times the amount of work and ten times the cost of these relaxed shades, but they are really lovely.

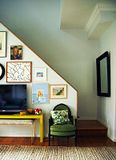
It is SO nice to have window treatments up so we don't have to keep the shutters closed all the time! And seriously, isn't this trim just perfect? So worth the wait to use it here!

PS Don't forget to vote! Thanks again!! :)


0 komentar:
Posting Komentar